What you need before you start
Three things: a subscription with a provider, the provider's app on each device you want covered, and a few minutes on a network you already trust — your home Wi-Fi is ideal. If you have not chosen a provider yet, start with the NordVPN review for the honest trade-offs, and the pricing guide for how the plan terms differ. If the whole concept is new, what a VPN actually is comes first and takes five minutes.
The steps below use NordVPN as the example because it is the one this site covers in depth, but every mainstream VPN follows the same shape: account, app, connect, choose a server, set two options.
Step 1: Choose a plan and create your account
Plans are sold by term — monthly, one year, or two years — and the service is identical either way. What changes is the per-month rate: longer terms cost less per month and more up front. Tiers above the base plan add extras like a password manager and breach monitoring; if you came for the VPN itself, the base tier is the whole product.
We deliberately do not print figures here, because promotions change them too often for a typed number to stay true — the pricing guide explains the structure, and the provider's own page shows today's numbers. Every plan carries a 30-day money-back guarantee, which makes even a longer term a smaller commitment than it looks: you get a month of real use before the decision is final. Sign up with an email address you check, because that is where account recovery goes.
Step 2: Install the app on every device you use
Download the app from your device's official app store, or from the provider's own website for a computer. There are apps for Windows, macOS, iOS, Android, and for Android TV and Apple TV — most households want it on the phone, the laptop, and any tablet that leaves the house.
Do the installing at home, before you need it. That advice matters most before a trip: in countries where VPNs are restricted, the app stores and the provider's site can be blocked, so the download has to happen before you land. Our travel guide has the full pre-flight checklist.
From my rewards apps
Let Your Receipts Help Pay for It
A VPN is a subscription, and subscriptions add up. The free app I use most turns grocery, gas and takeout receipts into points for gift cards — small wins that quietly offset a bill like this one. Join free, scan your first receipt, and the 2,000 bonus points are yours.
Get Fetch — 2,000 Bonus Points →I may earn a commission if you join through my link, at no extra cost to you.
Step 3: Sign in and press connect
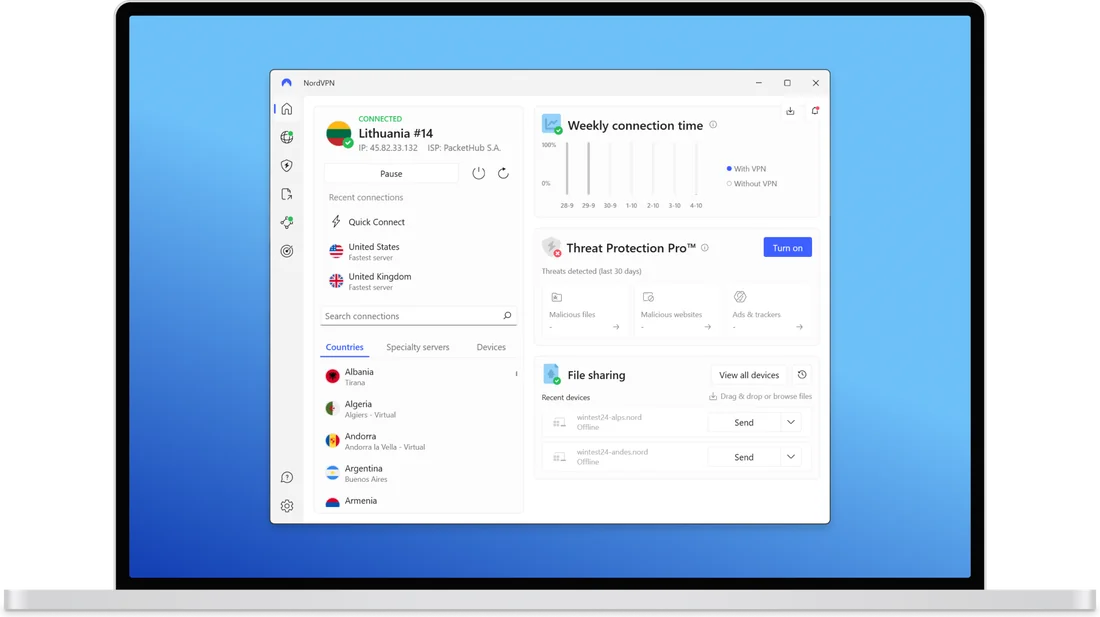
Open the app, sign in with the account from step 1, and use the big connect button — usually labelled Quick Connect. The app picks a fast server near you, and within a few seconds the status flips to Connected, with the server's location named on screen.
From that moment, everything on the device travels through the encrypted tunnel — every browser and every app, not just the one you are looking at. That status line is the thing to check whenever you sit down on a new network: if it does not say you are connected, you are not covered yet.
Step 4: Pick a server location
The automatic choice is right most of the time. You pick a location yourself when where-you-appear-to-be is the point:
- Nearest server: the everyday default, and the fastest. Encryption plus a short hop costs you very little speed.
- Your home country, while travelling: your bank, email and subscriptions see a session that looks like it came from home, which avoids a good share of fraud-check friction abroad.
- Your home country, for streaming: the catalog you pay for is licensed by territory, so appearing to be home usually restores it — with real limits, covered in the streaming guide.
- A specific other country: for that country's sites and catalogs. Nothing about the choice is permanent — tap a different pin on the map and you have moved.
Step 5: Turn on the kill switch
The kill switch answers one question: what happens if the VPN connection drops mid-session? With it off, your device quietly carries on without protection, and you may never notice. With it on, your traffic pauses until the tunnel is back — nothing leaks in between.
You will find it in the app's settings, usually under its own heading. Turn it on and leave it on. The one honest caveat: on a flaky connection you will feel it working, because a dropped tunnel means a brief pause rather than a silent hand-off. That pause is the feature doing its job.

We earn a commission if you purchase through our links, at no extra cost to you.
Step 6: Turn on auto-connect
Auto-connect makes the VPN start by itself in the situations where you would otherwise forget: when the device joins a public or unsecured Wi-Fi network, and optionally whenever the app launches. Set it to switch on for untrusted networks at minimum — hotel, airport and café Wi-Fi are exactly the networks a VPN earns its keep on, and they are also the ones you join while tired, rushed, or holding a boarding pass.
One ordering detail that trips people up: hotel and airport networks show a sign-in page (a captive portal) before they let you online. Join the network and finish that page first, then let the VPN connect — if the portal page refuses to load, disconnect the VPN for a moment, complete the sign-in, and reconnect.
How to tell it is working
Three quick checks, any one of which settles it:
- The app's status says Connected and names the server location you chose.
- Search "what is my IP address" with the VPN off, then on: the location shown should change to the server's city.
- Sites start behaving as though you are in that location — local results, local catalog, local language prompts.
Three first-week hiccups, and the fix for each
- A site or your bank refuses the connection. Some services block addresses belonging to known VPN servers. Switch to a different server in the same country and try again — there are usually several.
- Everything feels slow. You are almost certainly connected to a far-away server. Reconnect to the nearest one and the lag goes with the distance.
- The hotel Wi-Fi sign-in page will not appear. The captive portal problem from step 6: disconnect, join the network, finish the sign-in page, then reconnect.
That is the whole routine. After the first week, using a VPN is one glance at a status line — and on public networks, not even that, because auto-connect has already handled it.

The setup takes about ten minutes
NordVPN is the service this guide is written around: an independently audited no-logs policy, servers in 118+ countries, 10 devices on one subscription, and apps for everything down to the TV. If it is not for you, the 30-day money-back guarantee covers the first month.
Get NordVPN →Or read the full review with the trade-offs first.